Thursday, June 18, 2009
Final Post
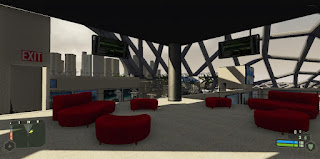
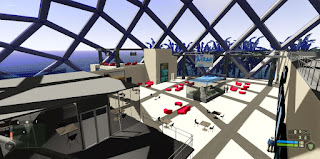
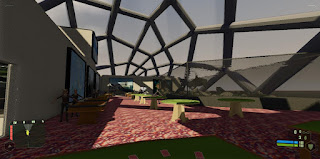
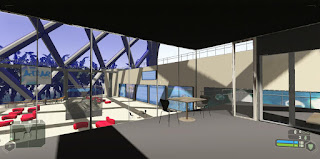
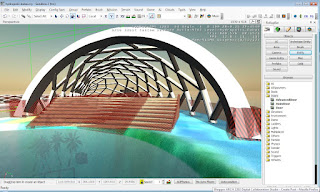
Our model of the Hydropolis is finally complete. After many days and night spent in the level two labs our team has come up with what I think is a great map. Eva, Stephen, Allan and I have worked very well as a team. I have learnt to collaborate with people with different skills and backgrounds. This course has taught me a lot about time management and working as a team member giving good and bad feedback so that we can constantly get the best out of our work.
Videos for presentation
Making the trailer and the extended two minute video was a difficult task. Because our file was so big with lots of cgf. models and materials our map was crashing a lot. This made it difficult for using fraps and other video recording program as the frame rate was very low. I used the tutorial I had made to capture our shots. Because this tutorial captures frame by frame there was no lag when we complied the images together. To get the idea for our trailer I researched many movie trailers. Using premiere pro and 3ds animation I was able to compile this trailer.
The Two minute extended trailer was made by dividing up the Hydropolis into sections. The coastline, the island, the shell etc...
The Two minute extended trailer was made by dividing up the Hydropolis into sections. The coastline, the island, the shell etc...
Final Map
Working on the last part of this assessment was very challenging but interesting for me. Our team had to fix up many small issues from the previous map. Such as fixing all the elevators so that we could call it from which ever floor we were on, also fixing the sliding doors, and decorating the underground subway. But I think our main concern was to fill the interior space of the shell and rooms below. To do this I had to reduce the scale of the stadium so that a walkway could be made from the top that lead down into the shell.
I had to export many 3ds models into sandbox. This was not an easy task. All up I probably spent about 20 hrs on how to export without errors but in the end I realized the SDKMOD was really just for exporting simple geometry objects and could not handle models with lots of vertices. A good way to export I found was to do the following steps:
1. Open model and select the same textured objects in that model
2. Export (selected objects only) as a DWG
3. Open new, import the DWG (change weld to 0.01)
4. Save into objects directory in crysis
5. Select the layer and export node.
By doing this it separates the same textured objects and puts it in a layer that can be exported more easily. This is how I was able to export most of the models into the shell.
Texturing didn't take as long to figure out. After reading the crymod.doc website I found out that sandbox only recognizes .dds format images when texturing. Using the plug in I got from Harry, I was able to adjust all textures in photoshop and saved as a square .dds format. Then Allan was able to apply them in sandbox using the material editor and changing the UVW mapping settings. Overall it turned out to be quite realistic.


Wednesday, June 3, 2009
Specialization tutorials
I found the Crymod manual website which had instructions on how to capture images, sound and demo record in sandbox using the console commands. Using those instructions I created these tutorial.
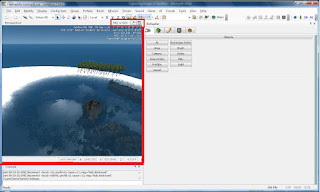
Here is a link to my tutorials
Beginner level :
http://attachments.wetpaintserv.us/HSIcFnRkSVxw%2B4o6CxItnw%3D%3D1363009
Medium Level:
http://attachments.wetpaintserv.us/di9UIV%24oZZZZDHGevxcimg%3D%3D83698
Advance Level:
http://attachments.wetpaintserv.us/di9UIV%24oZZZZDHGevxcimg%3D%3D83698

Here is a link to my tutorials
Beginner level :
http://attachments.wetpaintserv.us/HSIcFnRkSVxw%2B4o6CxItnw%3D%3D1363009
Medium Level:
http://attachments.wetpaintserv.us/di9UIV%24oZZZZDHGevxcimg%3D%3D83698
Advance Level:
http://attachments.wetpaintserv.us/di9UIV%24oZZZZDHGevxcimg%3D%3D83698
Wednesday, May 20, 2009
Projected outcomes for specialization
Easy Outcomes
I will create a tutorial that explains how to capture still images within the crytek sandbox editor. Using the console commands a step by step explanation will be provided.
Medium Outcomes
The medium result will be to capture video and sounds while in sandbox. Like the image capture, I will show this tutorial by using the console command in sandbox 2
Difficult Outcomes
The final tutorial will explain how to capture a demo recording within the crytek engine. This tutorial will show you how to record the actually events while playing the game
Tuesday, May 5, 2009
Team Feedback
Team Digilism
Strengths - Surrounding building where very well presented and the textures were applied well.
Weaknesses - More interavtive elements, Could have use AI to show scale and maybe more rendered images.
Team Orange
Strengths - Landscape, Nice AI and interior.
Weaknesses - Maybe the building is too tall for the surrounding area.
Team E-Vovle
Strengths - Nice interior features, great textures on furniture.
Weaknesses - Could not get the picture of the overall design.
Team Urbans
Strengths - Research into building, Nice scale video.
Weaknesses - Better scaled textures.
Team Omega
Strengths - Well planned landscape and nice interior features.
Weaknesses - Textures adn a bit plain in colour.
Progress
I have encountered some problems when importing into crysis from 3ds. When I export from 3ds to sandbox with no textures applied, I realised sandbox turns the objects into transparent items. To fix this we put barriers on the surfaces of the objects.
Making of the elevator was pretty easy following the tutorial. I decided that having a sliding door to open the elevator would be a good touch, so I found this tutorial on how to make sliding doors in sandbox and incorporated it with the elevator. The results were great. I then put sounds and triggers in for elevator, doors and switches.
Using the idea from the elevator tutorial we have decided to make the moving train in the underground the same way as we did on the elevators.
Subscribe to:
Posts (Atom)